
Part of this assignment is done at home, individually, and part is done in the studio, in the usual teams.
A) At home, individually:
Part 1 - Compression Basics
Because a file was missing last week, please re-download the "Compression and EQ Audio" folder from this Google Drive link:
https://drive.google.com/file/d/1iDL2mKiQDQl1j-5kFNolRUhfEtLmSH04/view?usp=share_link
• Create a new Logic project with one track.
• Load the compressor plug-in. At the top of the plug-in window, click on the pull-down menu (where it says "Factory Default"), and select "Load…", then choose the "David - Compressor Reset" from the Compression Audio folder you just downloaded.
• Import the "Original.wav" file. Then, listen to "Version A" outside of Logic (you can just lick on the file in the Finder and hit spacebar, it will play in place), and, using ONLY a compressor in Logic (use the Platinum Digital mode) make "Original" match "Version A".
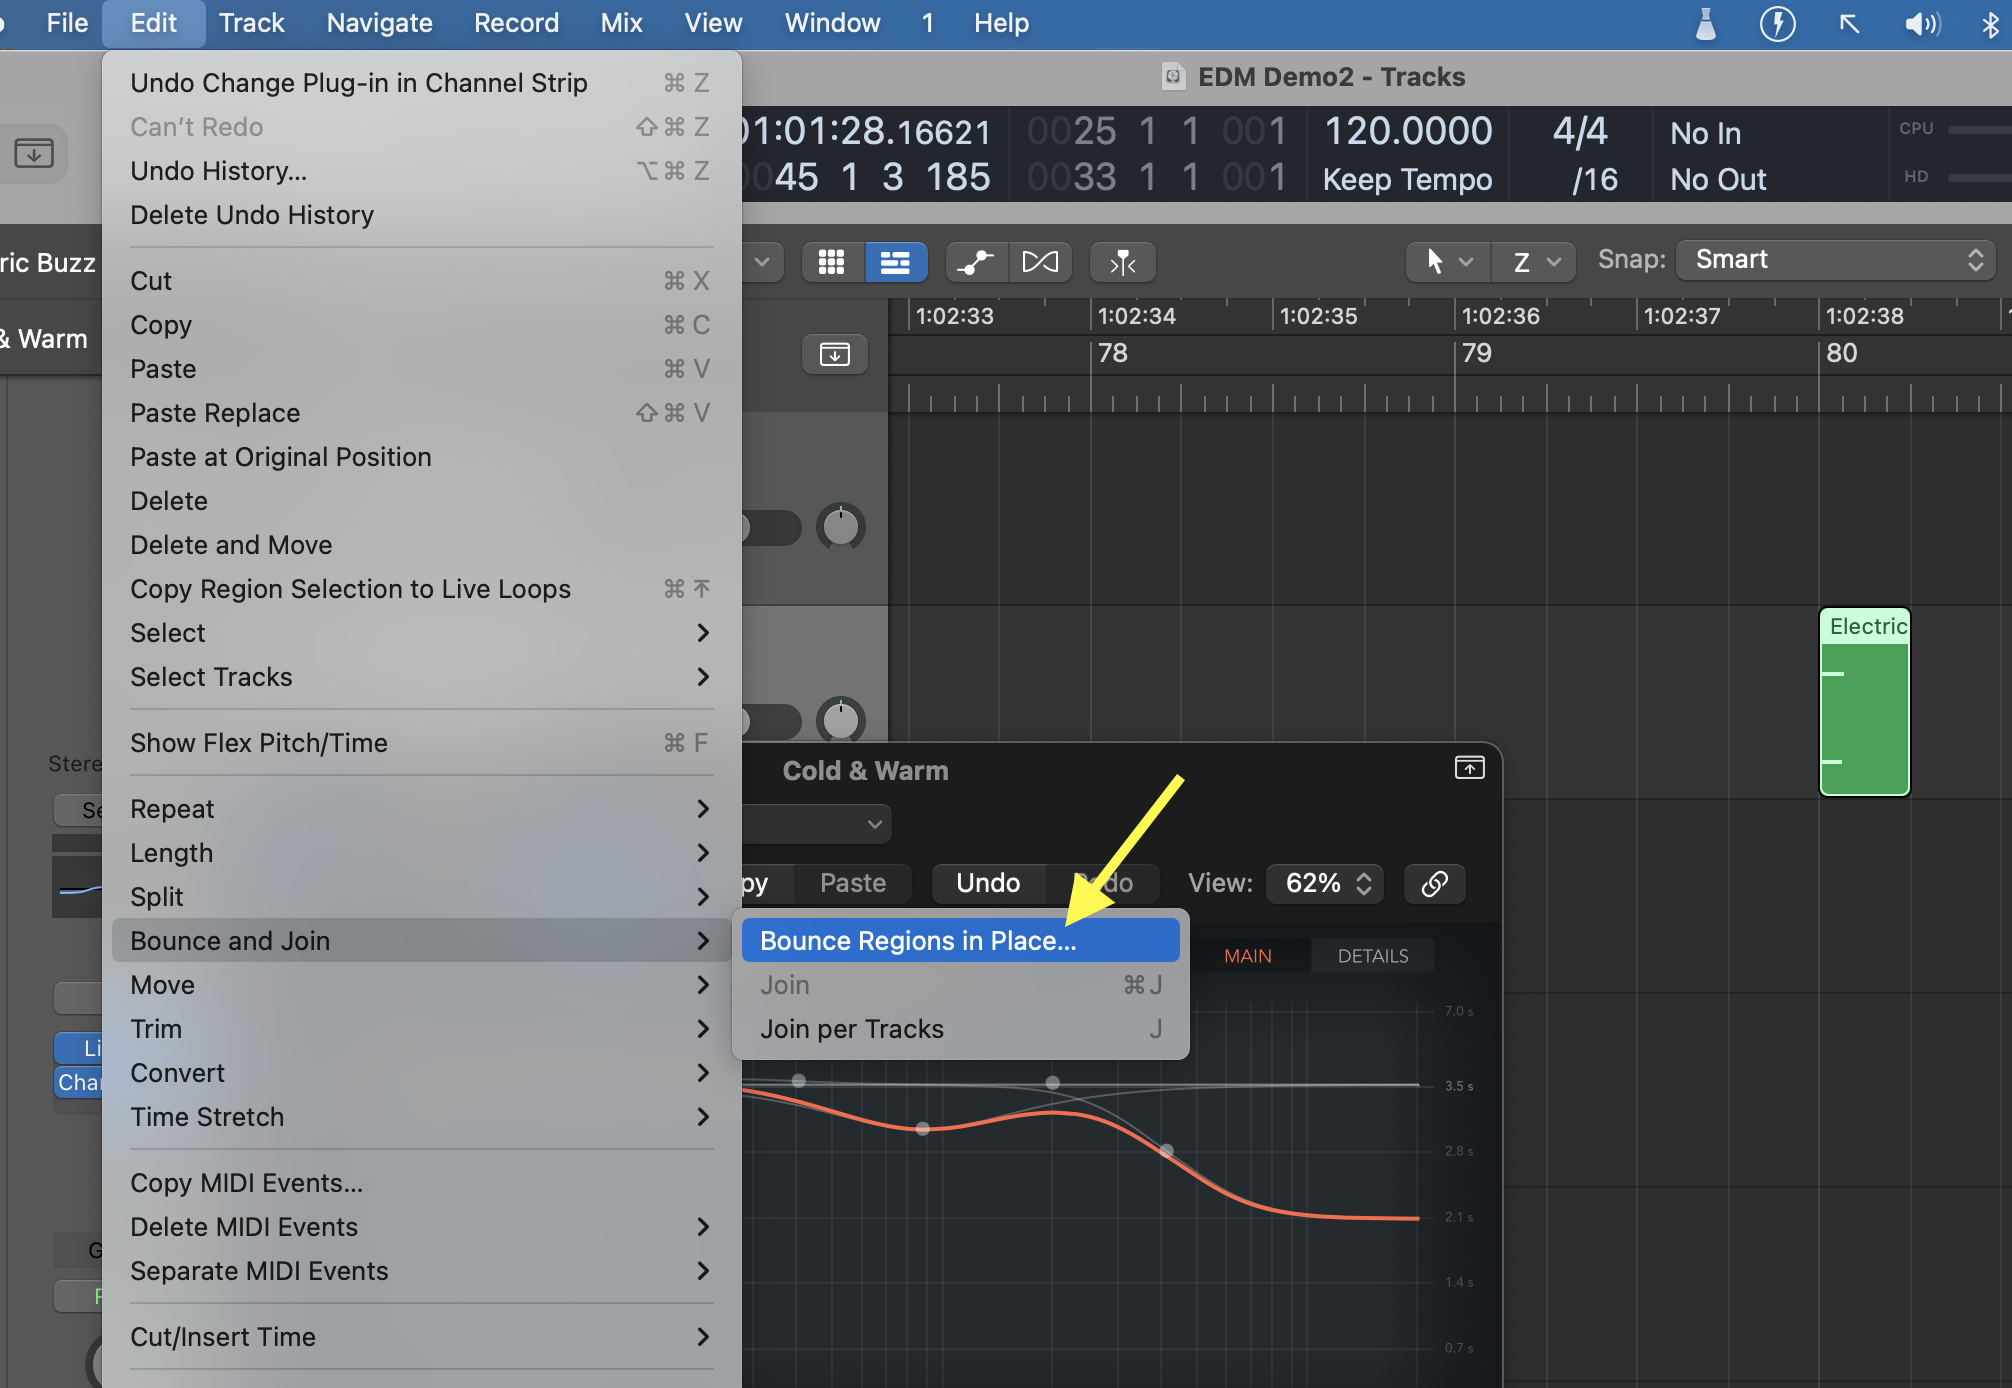
• Bounce what you've done to a new track:
Click on the audio "Original.wav" region, the go to Edit>Bounce and Join>Bounce in Place
Apply these settings:
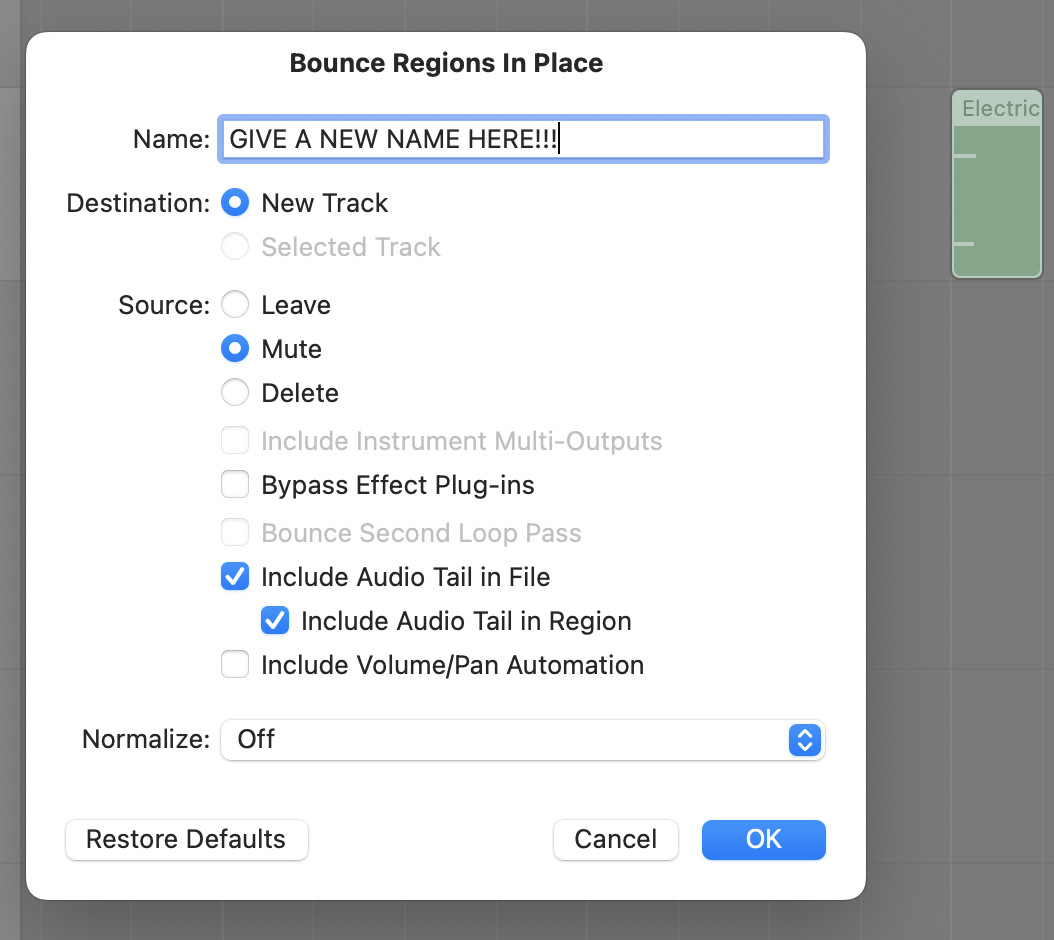
Click on "Bounce". A new AUDIO track will be created with the compression applied to the Original.wav sound.
• Once done, create a new track, add a compressor (choose the reset preset), and copy the "Original.wav" file onto it. Then, make "Original", sound like "Version B", and bounce in place like in the above.
DO NOT import Version A and Version B into Logic. Listen to those files using some other software (you can just hit space-bar in a Finder window).
Part 2- Compression - Side Chain
• Mute the previous tracks, and create two new tracks. Import the files "Synth_short.wav" and "Kick_short.wav". Configure a sidechain with a compressor on the "Synth" track using the Kick as the trigger, with the goal of creating a "pumping" effect.
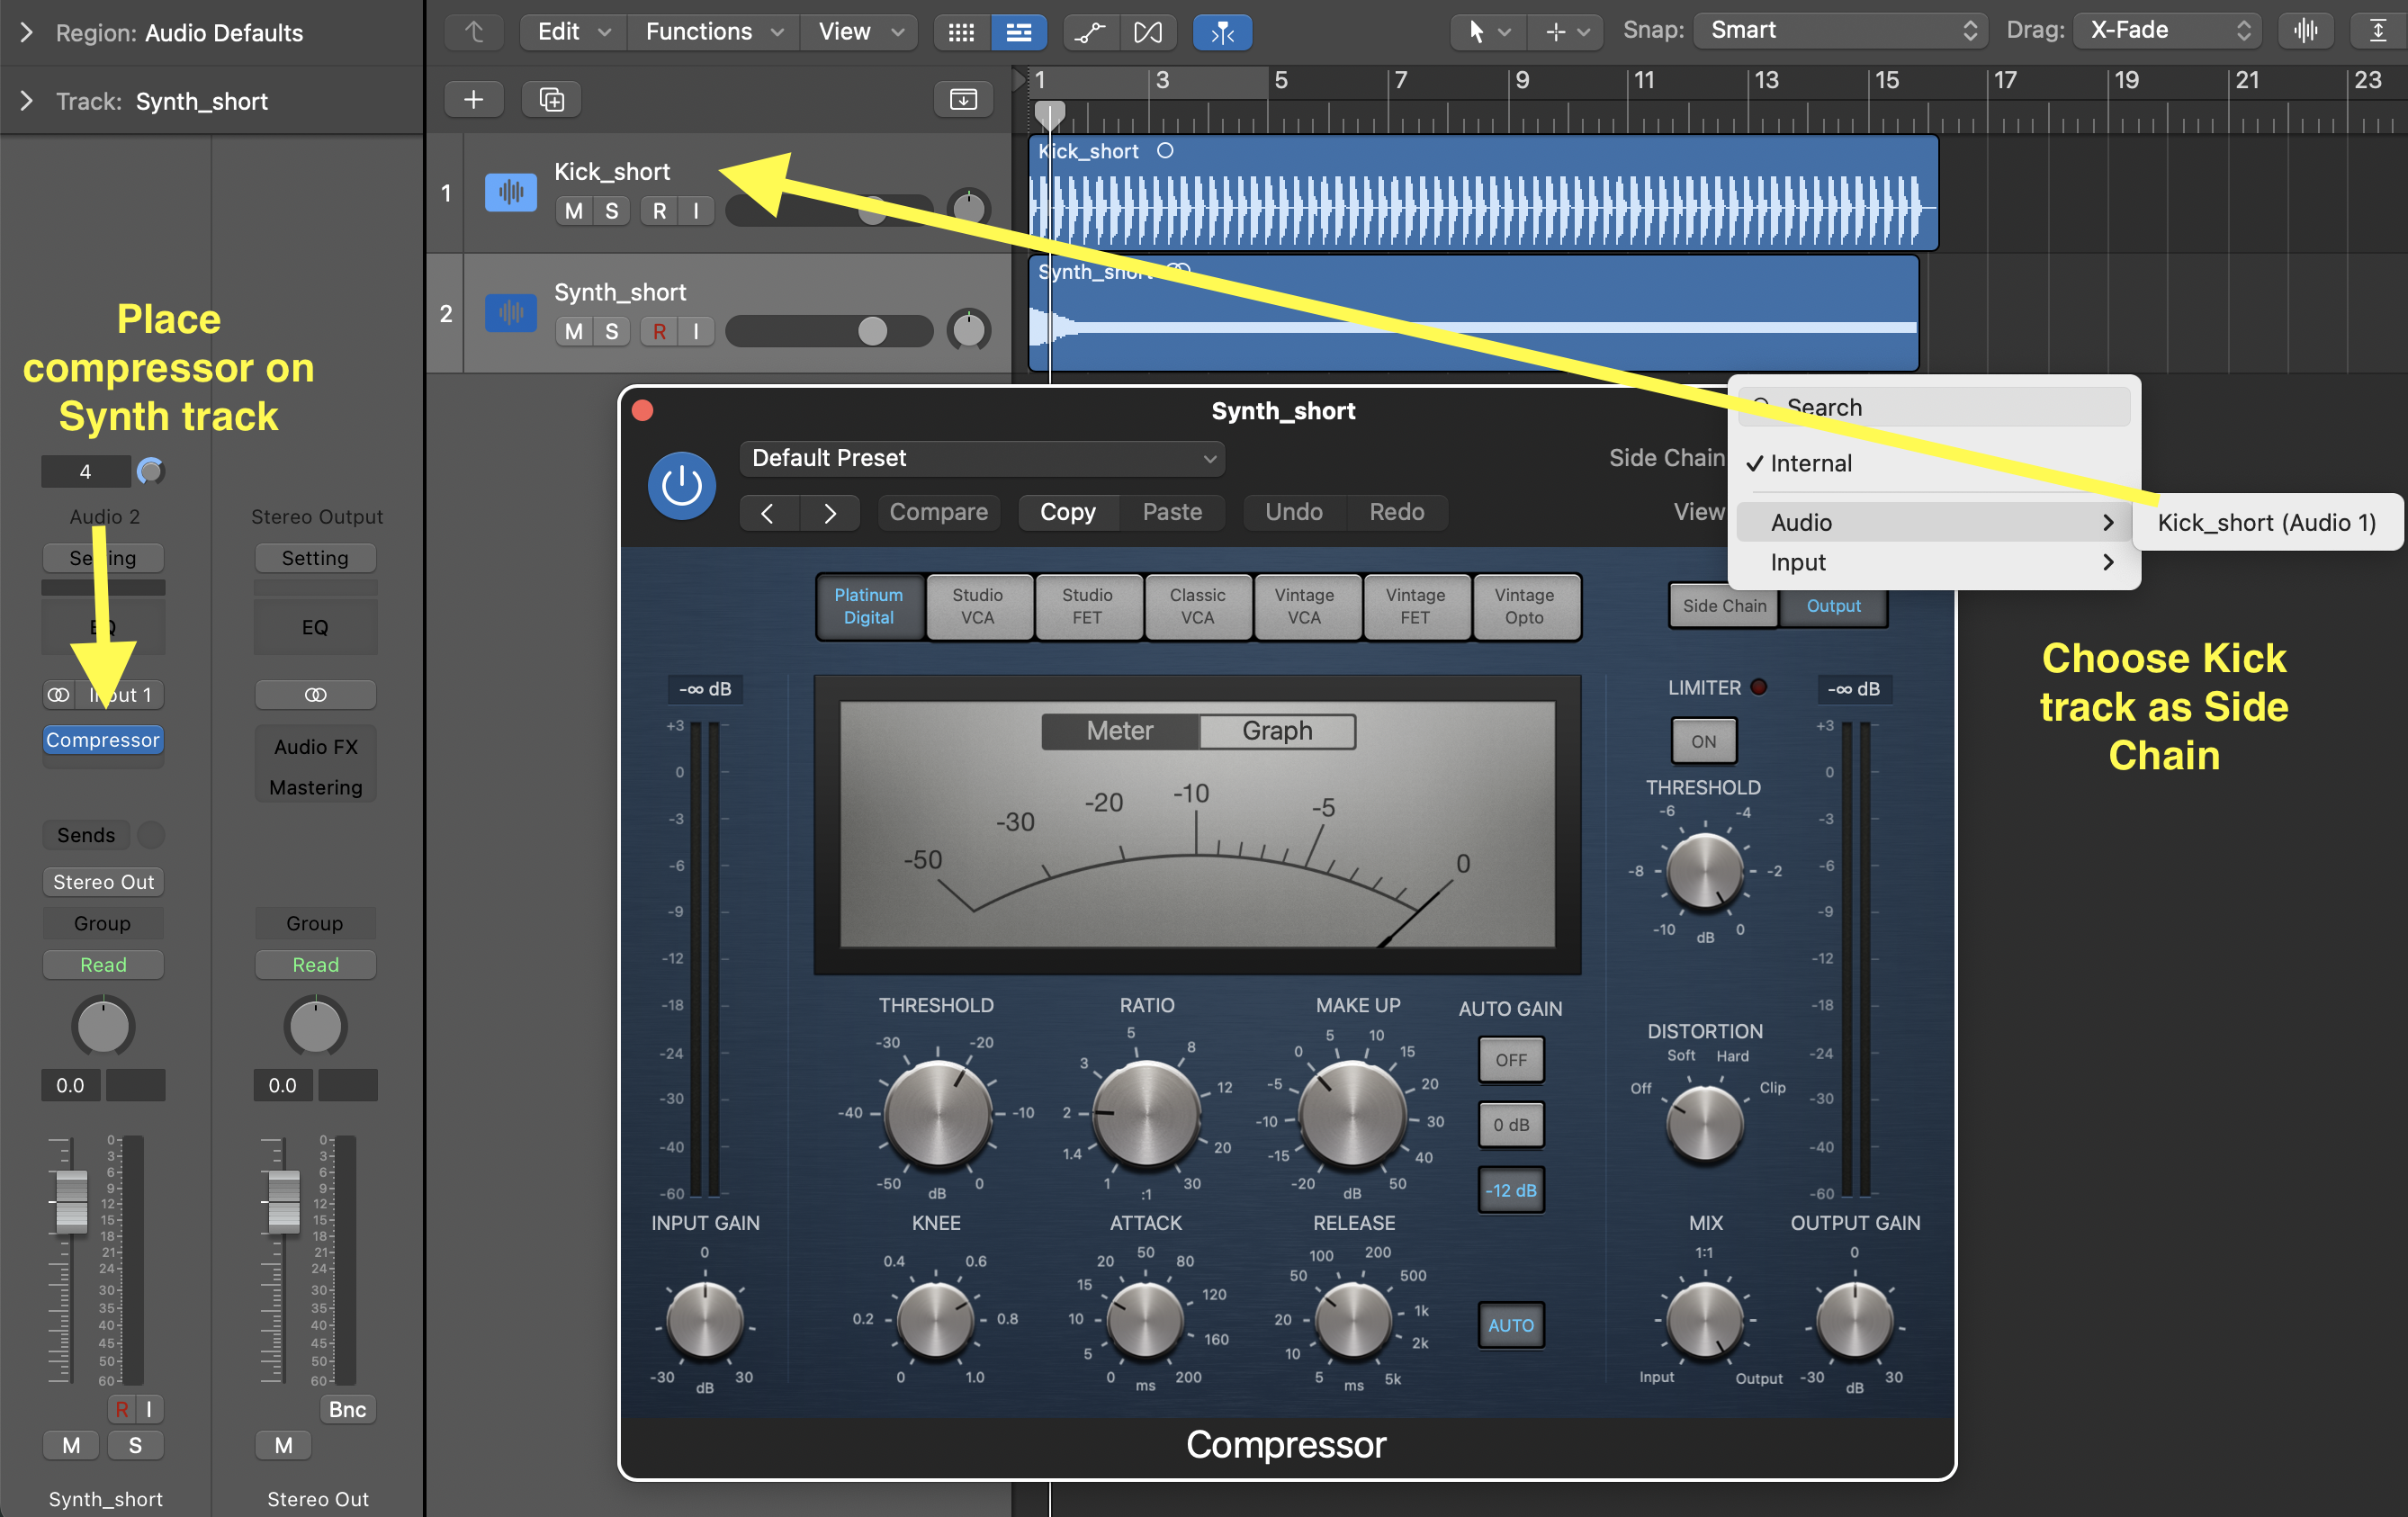
Experiment with different attack and release times to see how it affects "pumping". Also, try the various emulation modes (the grey buttons at the top of the compressor: Studio VCA, Studio FET, etc.).
Part 3 - EQ training (if not already done from two weeks ago)
• Go the Technical Ear Trainer website
• Follow these instructions:
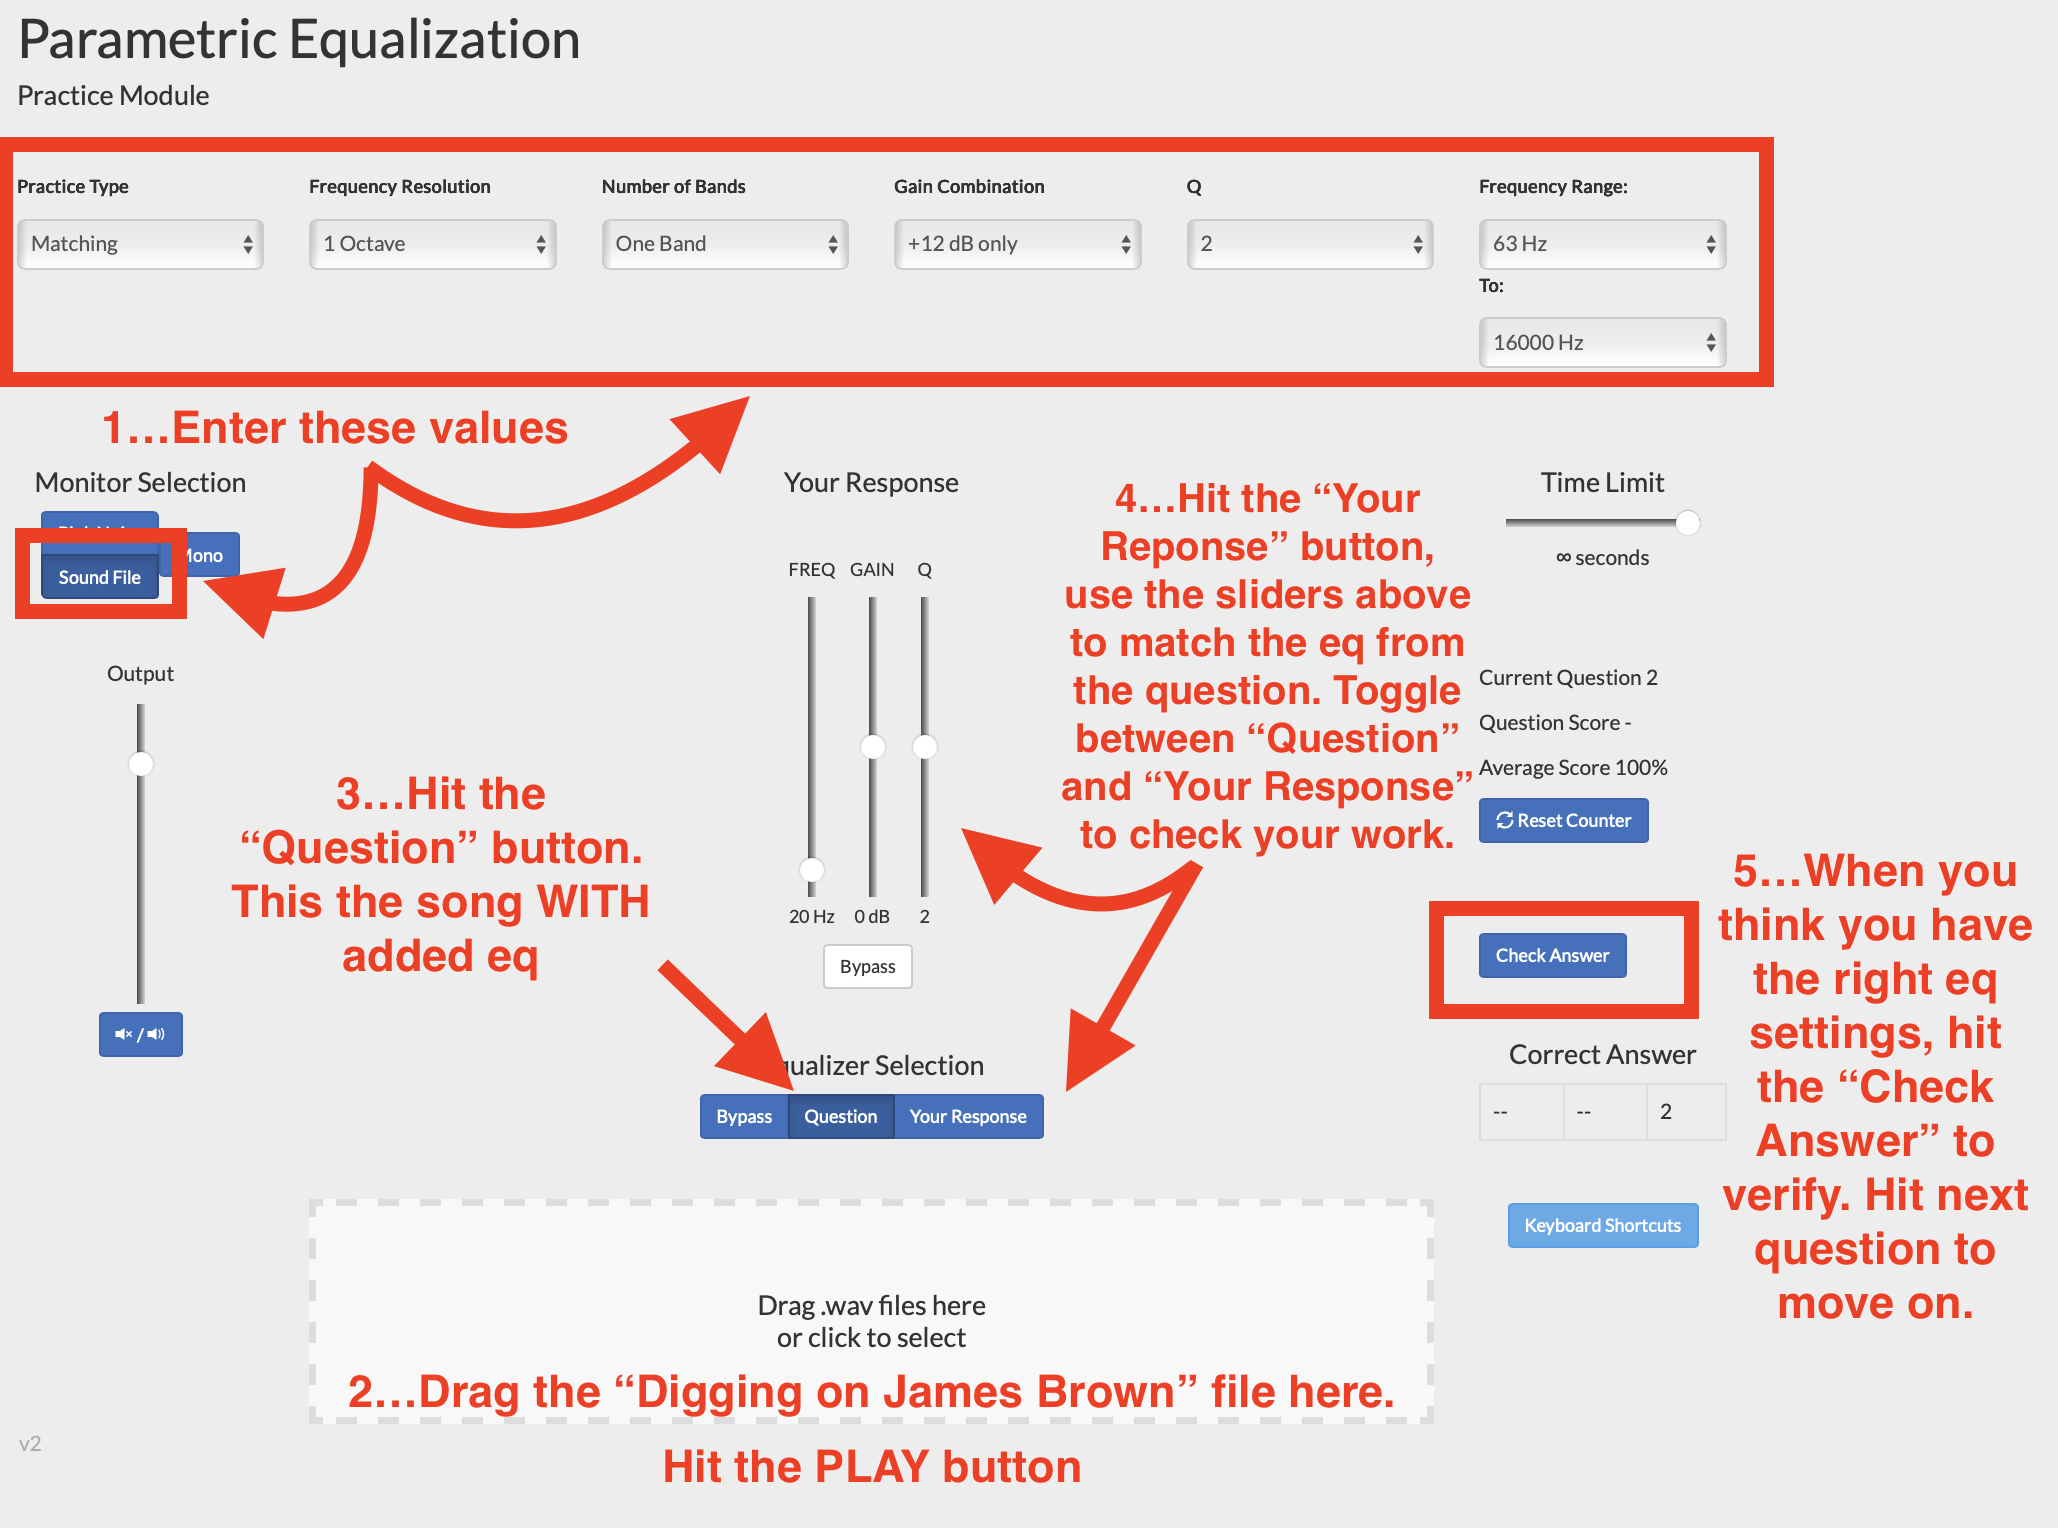
Use the "Digging on James Brown" song that's included in the audio folder you downloaded above.
• Complete at minimum 20 questions using the suggested settings and song. After that, optionally, feel free to change to a song of your choice, and/or to modify the test parameters to make it more difficult (for example, consider changing the "Gain Combination" setting to +12/-12dB or even +12/+6/-12/-6dB).
• Take a screenshot of your final results, and upload it to your student folder on the 317 computer.
B) In 317, in teams:
Part 1 - Piano Recording
Record 4x 30sec of the Disklavier piano in 324. To operate the Disklavier, follow the plastic sheet on the piano (you will need to download an App). Choose a song that only uses piano. Use the Shure KMS141 mics, along the Millenia preamp, correctly patched into Logic; however, create TWO mono tracks instead of one STEREO track (there's an issue with stereo tracks and the Millenia I haven't been able to identify yet). Record the following, using always the same section of the song:
• Do one take with ONE mic at ~8" from the strings.
• Do one take with TWO mics in stereo, ~24" away from each other, at ~8" from the strings (pointing at the strings, mics in Cardioid mode), in player perspective.
Then,
• Do one take with ONE mic at ~36" from the strings.
• Do one take with TWO mics in stereo at ~36" from the strings, in audience perspective, and use AB spaced pair mic techniques, mics about 24" apart.
Then, edit all the takes so that you have the same 20 seconds, and place them end-to-end so that you can hear the 5 takes one after the other without interruption.
Part 2 - Stereo Techniques
In 317, record 3x 30sec of your voice and/or various objects or instruments in STEREO. Use both Shure KSM141 microphones, and do four recordings:
• one in AB position with CARDIOID mode
• one in ORFT position with CARDIOID mode
• one in XY position with CARDIOID mode
As above, create TWO mono tracks instead of one STEREO track.
Refer to the Sound Primer for more details on each technique. Record in the main room (do not use the booths; watch for feedback!). For each recording, stand about 24" away for the mics, move from left to right as you speak/sing/make sound, stopping at 7 specific positions, as if 7 people where around the mics as we did in class. When done, listen carefully and compare each recording; how do they sound different? Does one give a wider stereo image?
NOTE: Though the AB and ORTF techniques are typically setup using a special bar to hold two microphones, here use two stands instead.
As always, you need to focus on getting a good, clean recording, with proper levels (remember to aim for -6dB during the loudest parts). Please make sure you do the following:
Part 3 - Drums
Setup the drum set in main room in the studio (at minimum, place the bass drum, snare drum, and hi-hats, but feel free to add more if you know how). It's OK if you don't know how to place the drum components; just assemble them loosely together so that you can hit them randomly.
In the same Logic project as above, create FOUR mono tracks. Connect four mics as follows:
1-kick
2-snare
3-Stereo L
4-Stereo R
Place the mics as shown in class. You can also refer to this guide on how to setup (look at technique #1).
Use the Millenia preamp for the stereo (you will have to use the patchbay).
Record a 1min excerpt of someone playing the drums. It doesn't matter if you don't know how to play, just as long as you get some sound going.
Be prepared to present your Logic project in class
Grading:
/5 Good recording levels
loudest parts reach -6dB, no clipping
/5 Good quality sound capture from the microphones.
This depends on the sound you’re recording so it's a case-by-case situation, but in general a “bad” sound could involve any of the following:
noisy because of poor choice of mic, too much room sound, mic too close to the source (too focused and therefore unnatural), pop sounds from consonants if recording vocals, too bright, too dull, etc.