
**To be done individually, at home or in 317**
Part 1 - EQ
Required:
Download the "Compression and EQ Audio" folder from this Google Drive link:
https://drive.google.com/file/d/1iDL2mKiQDQl1j-5kFNolRUhfEtLmSH04/view?usp=share_link
(If using the studio computer, the "Compression and EQ Audio" folder is in the class folder)
A) Create a new project, and create two new tracks. Import the files "Acoustic_Guitar.wav" and "Piano_Chords.wav" (If asked, do not import tempo). Make sure both audio files start right on a bar line, and create a cycle (i.e., a playback loop) by selecting one of the files, and pressing the command-u keys (you can turn ON/OFF the cycle by pressing the "c" key). Then, using ONLY EQ, shape each sound so that the both the guitar and piano are clearly audible and balanced.
Hint: as a general rule, cut don't boost; however, here, a boost might be helpful on one of the two tracks.
B) Mute previous track, and create a new track; import the "Voice-MONO.wav" file. Use EQ to improve this recording's overall sound, as discussed in class. You should use a low cut filter, a low shelf filter, and a band filter.
C) Mute previous track, and create a new track. Import the "Disco_Break.wav" file. Put an EQ plugin on the track, and automate a high-cut filter to create a filter sweep from 100Hz to 20kHz from the beginning to the end of the file.
Part 2 - Reverb
• Mute previous track, and create a new track. Import the "Clarinet_Solo.aif" file.
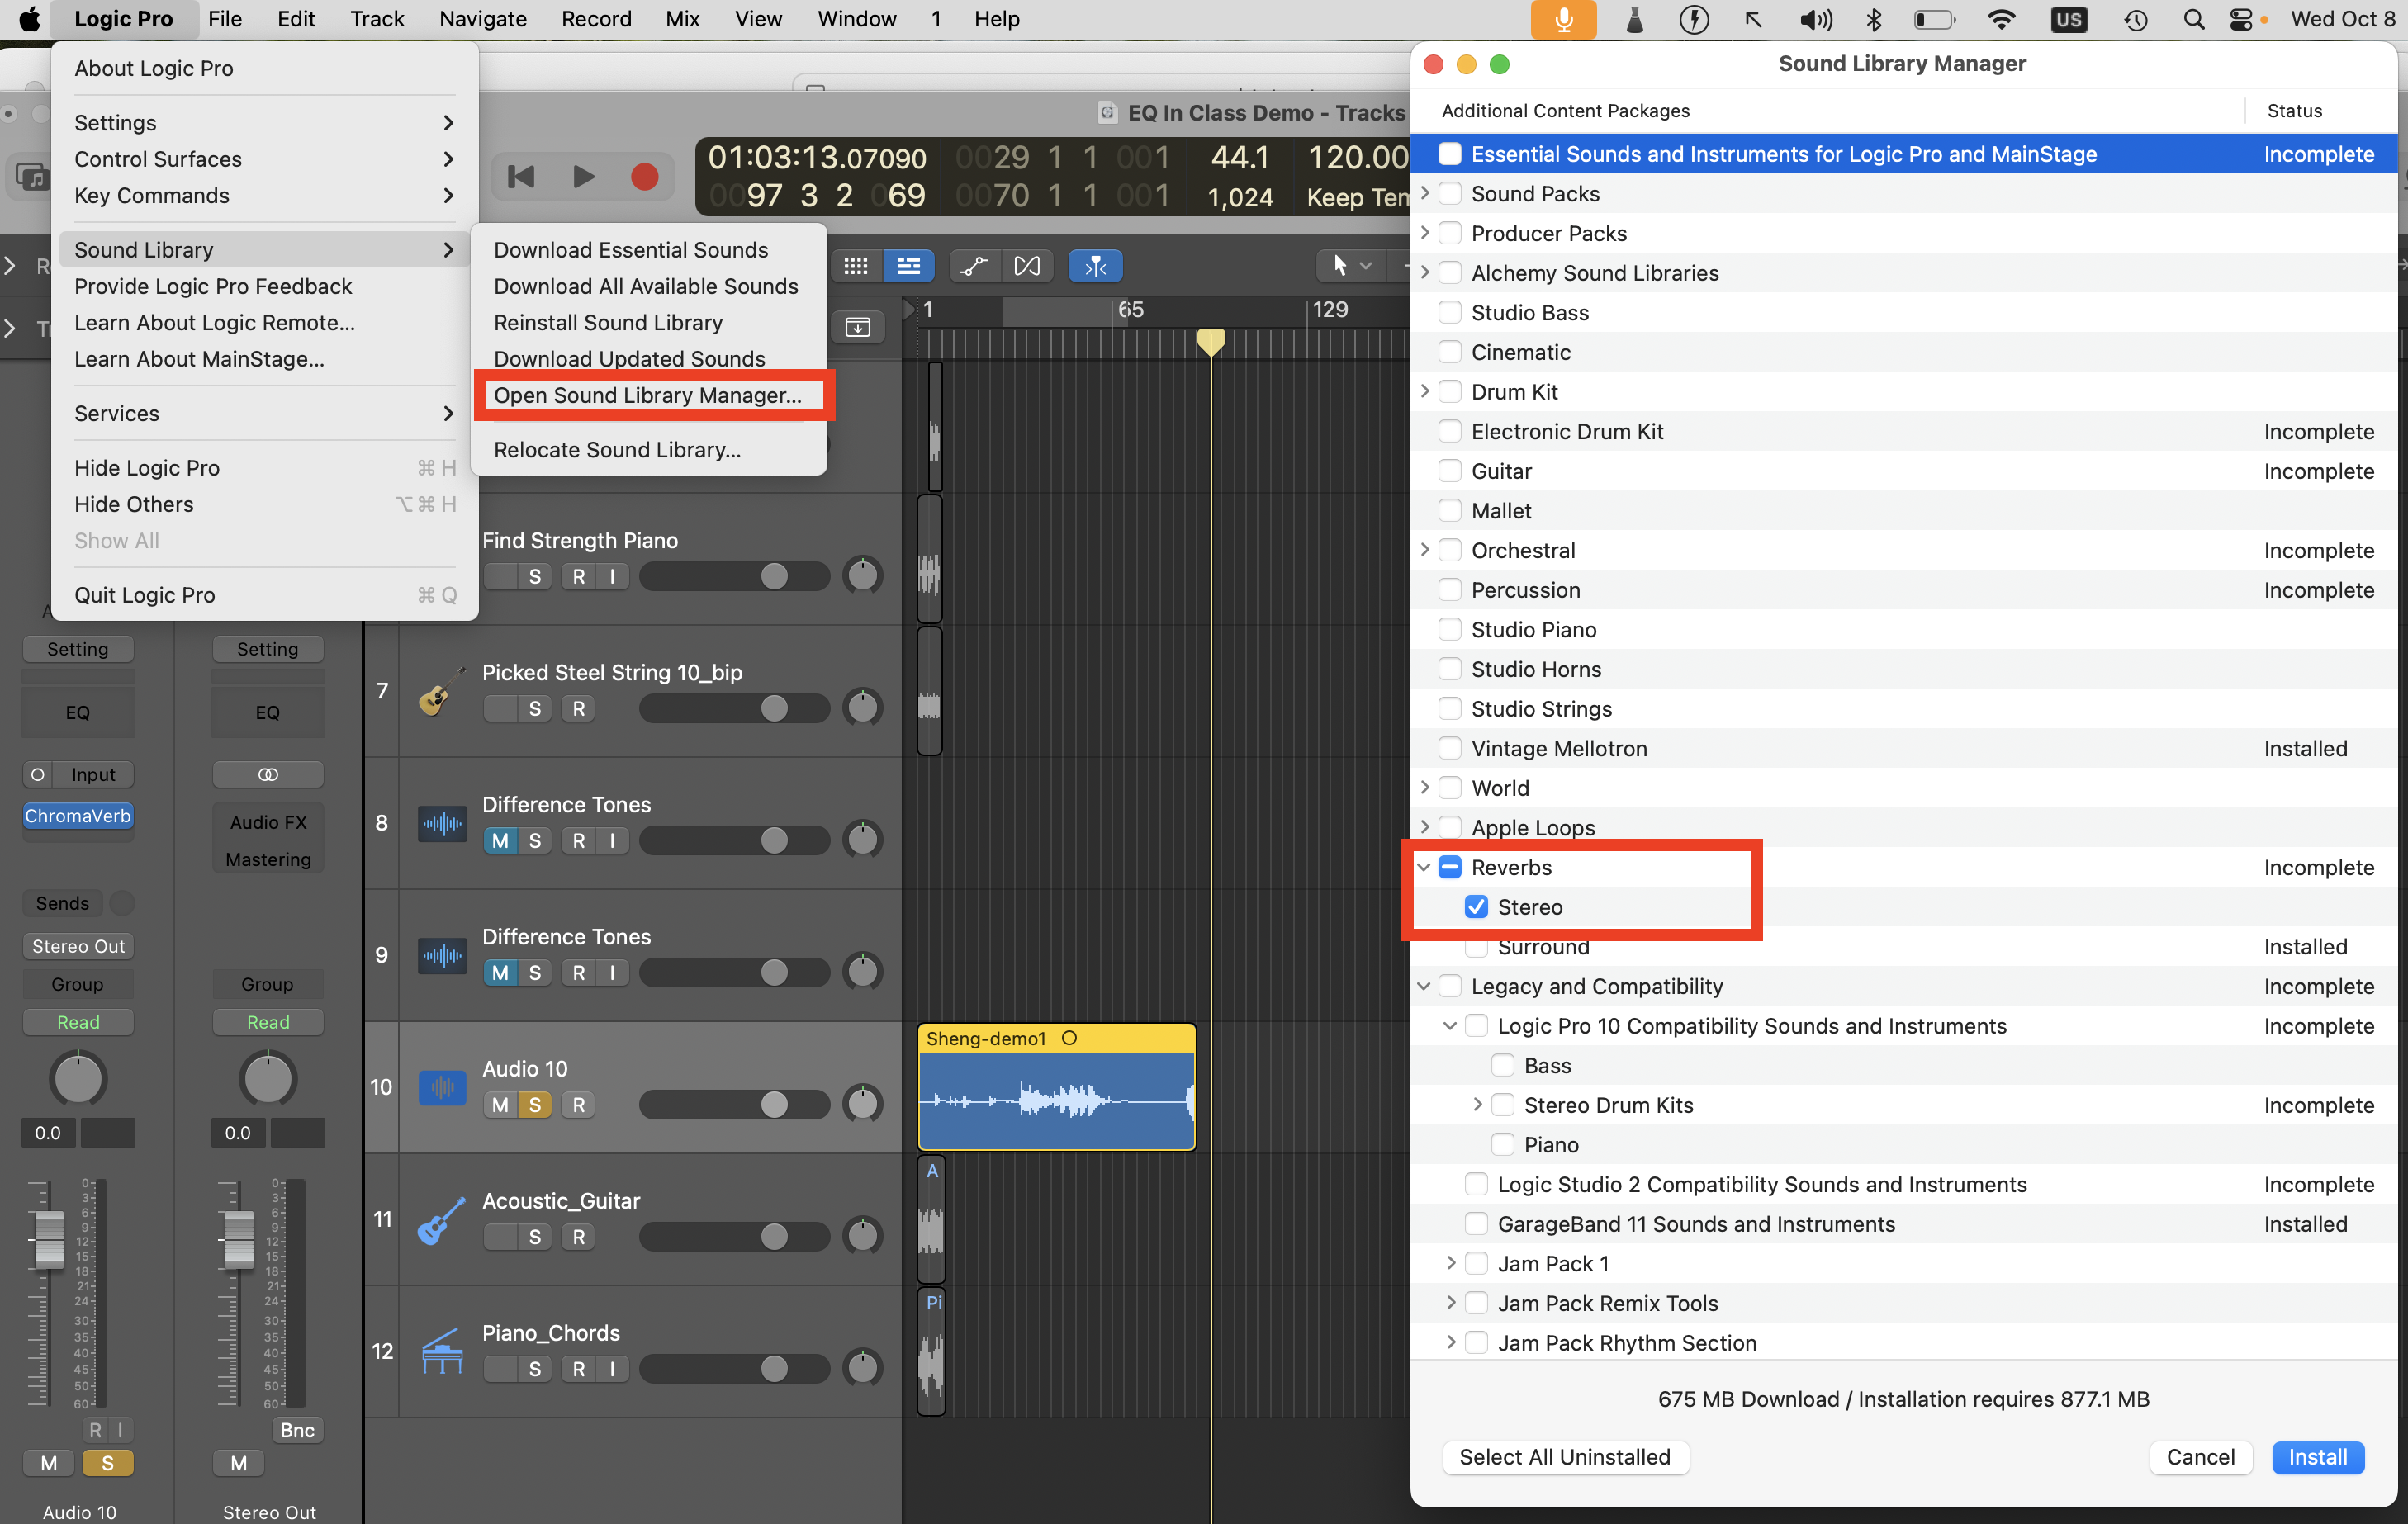
• Add a Chromaverb plugin, and play around the various presets.
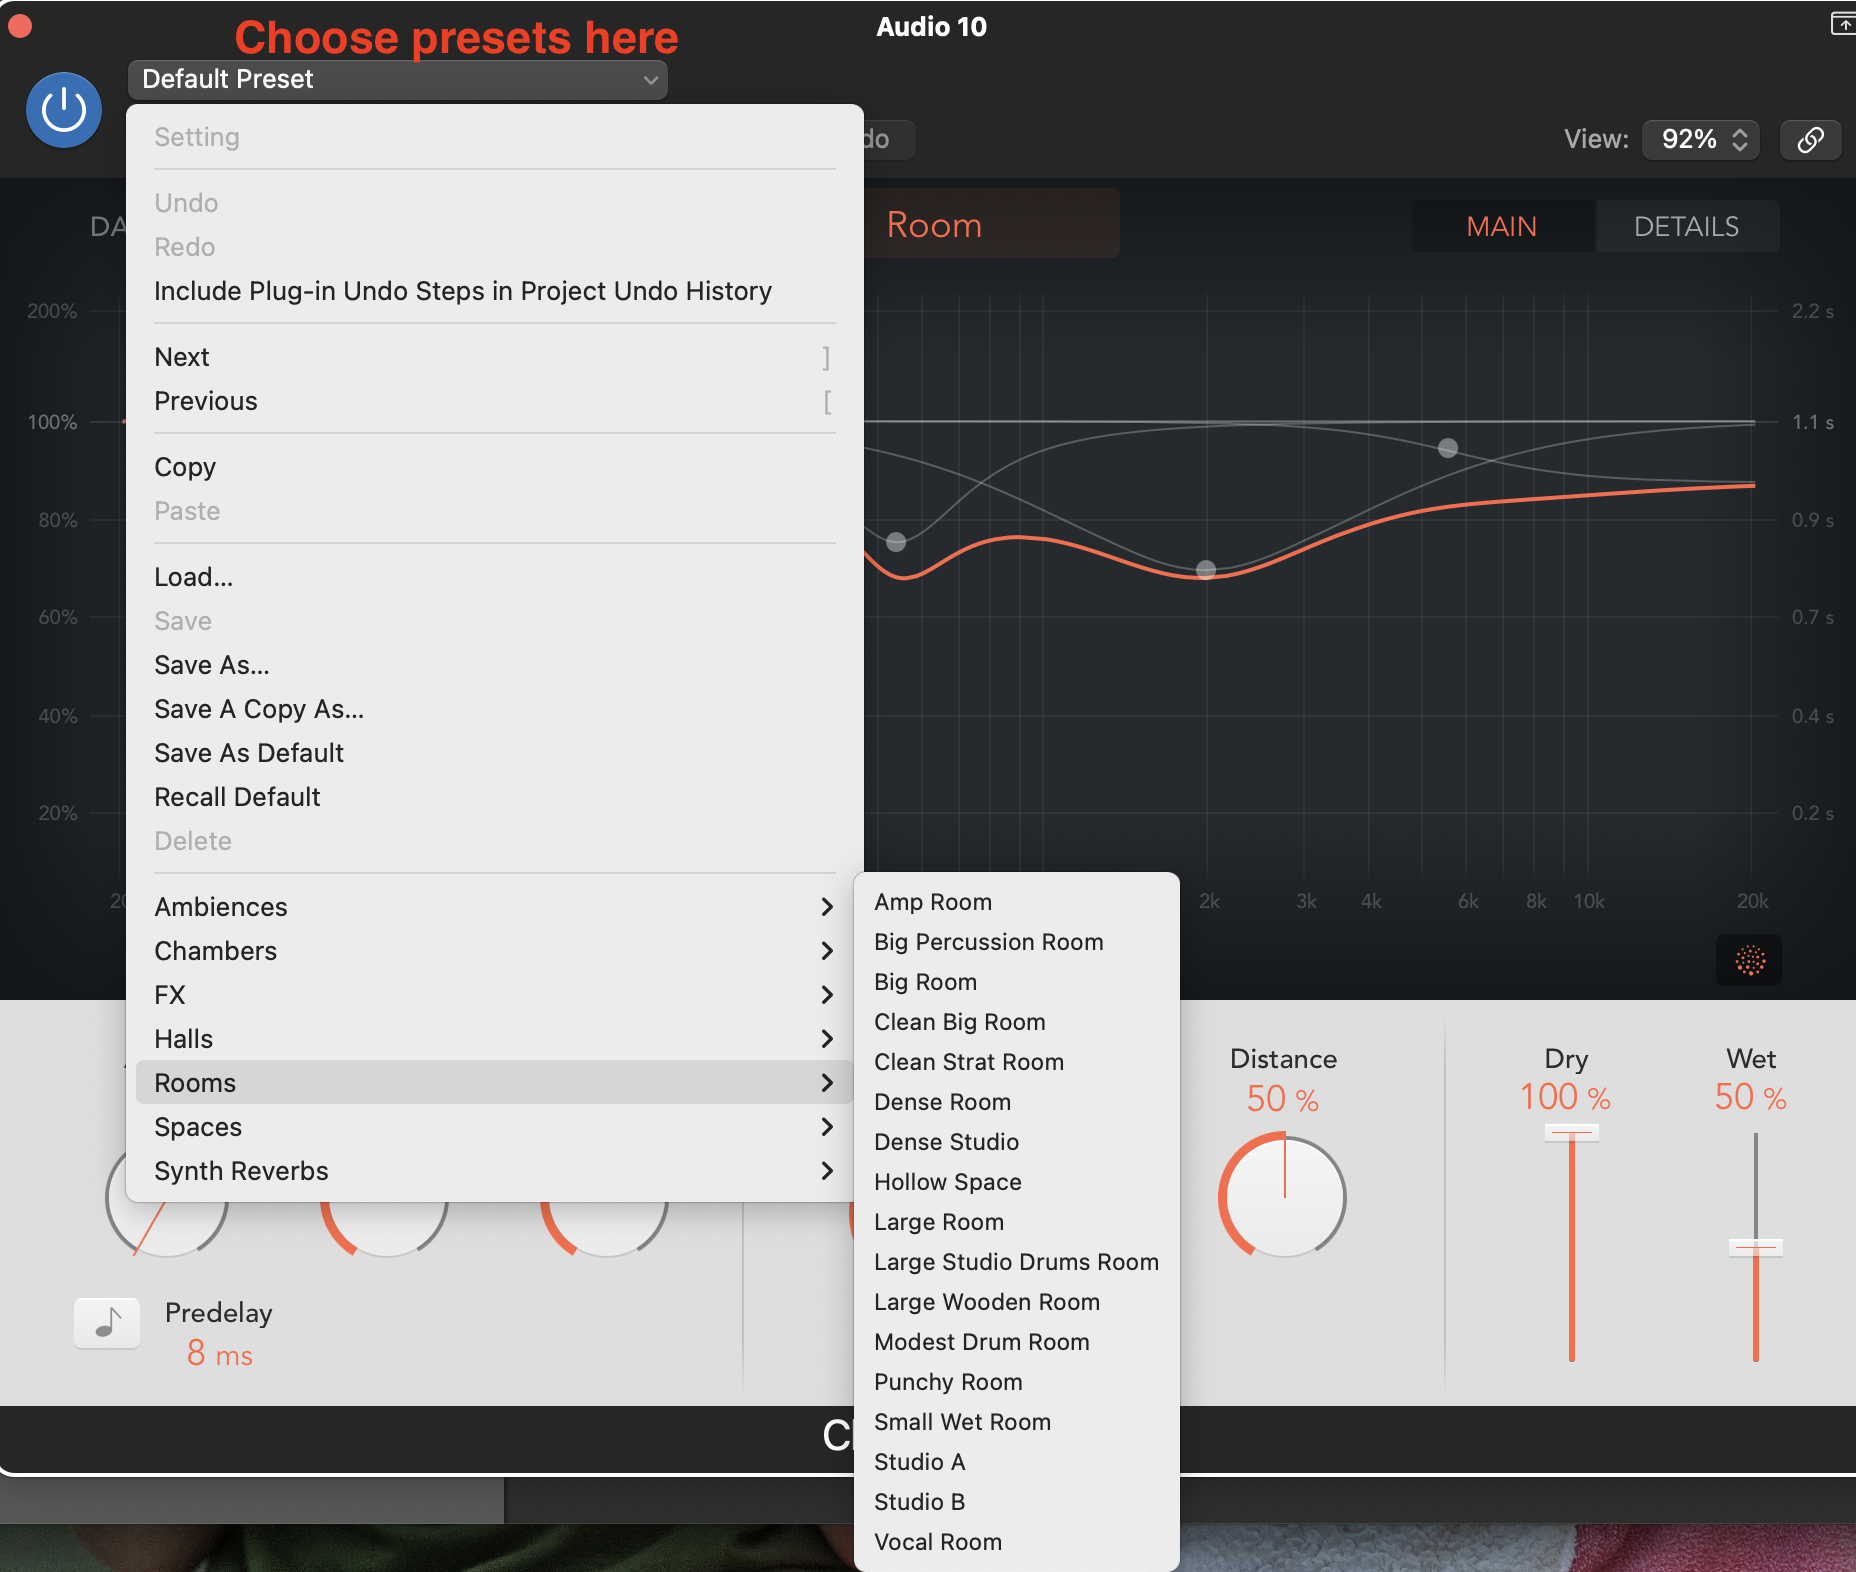
Here the object is simply to get familiar with the sound of this tool and experiment with the various settings; try moving the dials as you please and hear their effect. Do the same with the Space Designer and Quantec, always using the same clarinet audio.
If, on your computer, you don't have many presets available, then you'll need to install them:
Then..
• Mute previous track, and create a new track. Import the "Steps-MONO.wav" file.
• Loop the file (move our cursor to the center-right of the audio region until the cursor changes to a circle with an arrow, then click and drag-right to create 4 loops).
• Use automation (press "a" on the keyboard to turn on automation) and reverb to create a sense movement from the steps, giving the listener the impression that the steps are moving from side to side, and from near to far. Only use a Chromaverb or Space Designer with a preset of your choice. Aim for as much realism as possible; we should literally hear the steps coming closer, then going farther away, and going from left to right.
• Quick reminder:
1) choose a preset, and set Dry to 100% and the Wet to 10%.
2) Automate the Dry setting so that it slowly goes from 100% to about 5%, and then back up to 100%.
Part 3 - EQ training
• Go the Technical Ear Trainer website
• Follow these instructions:
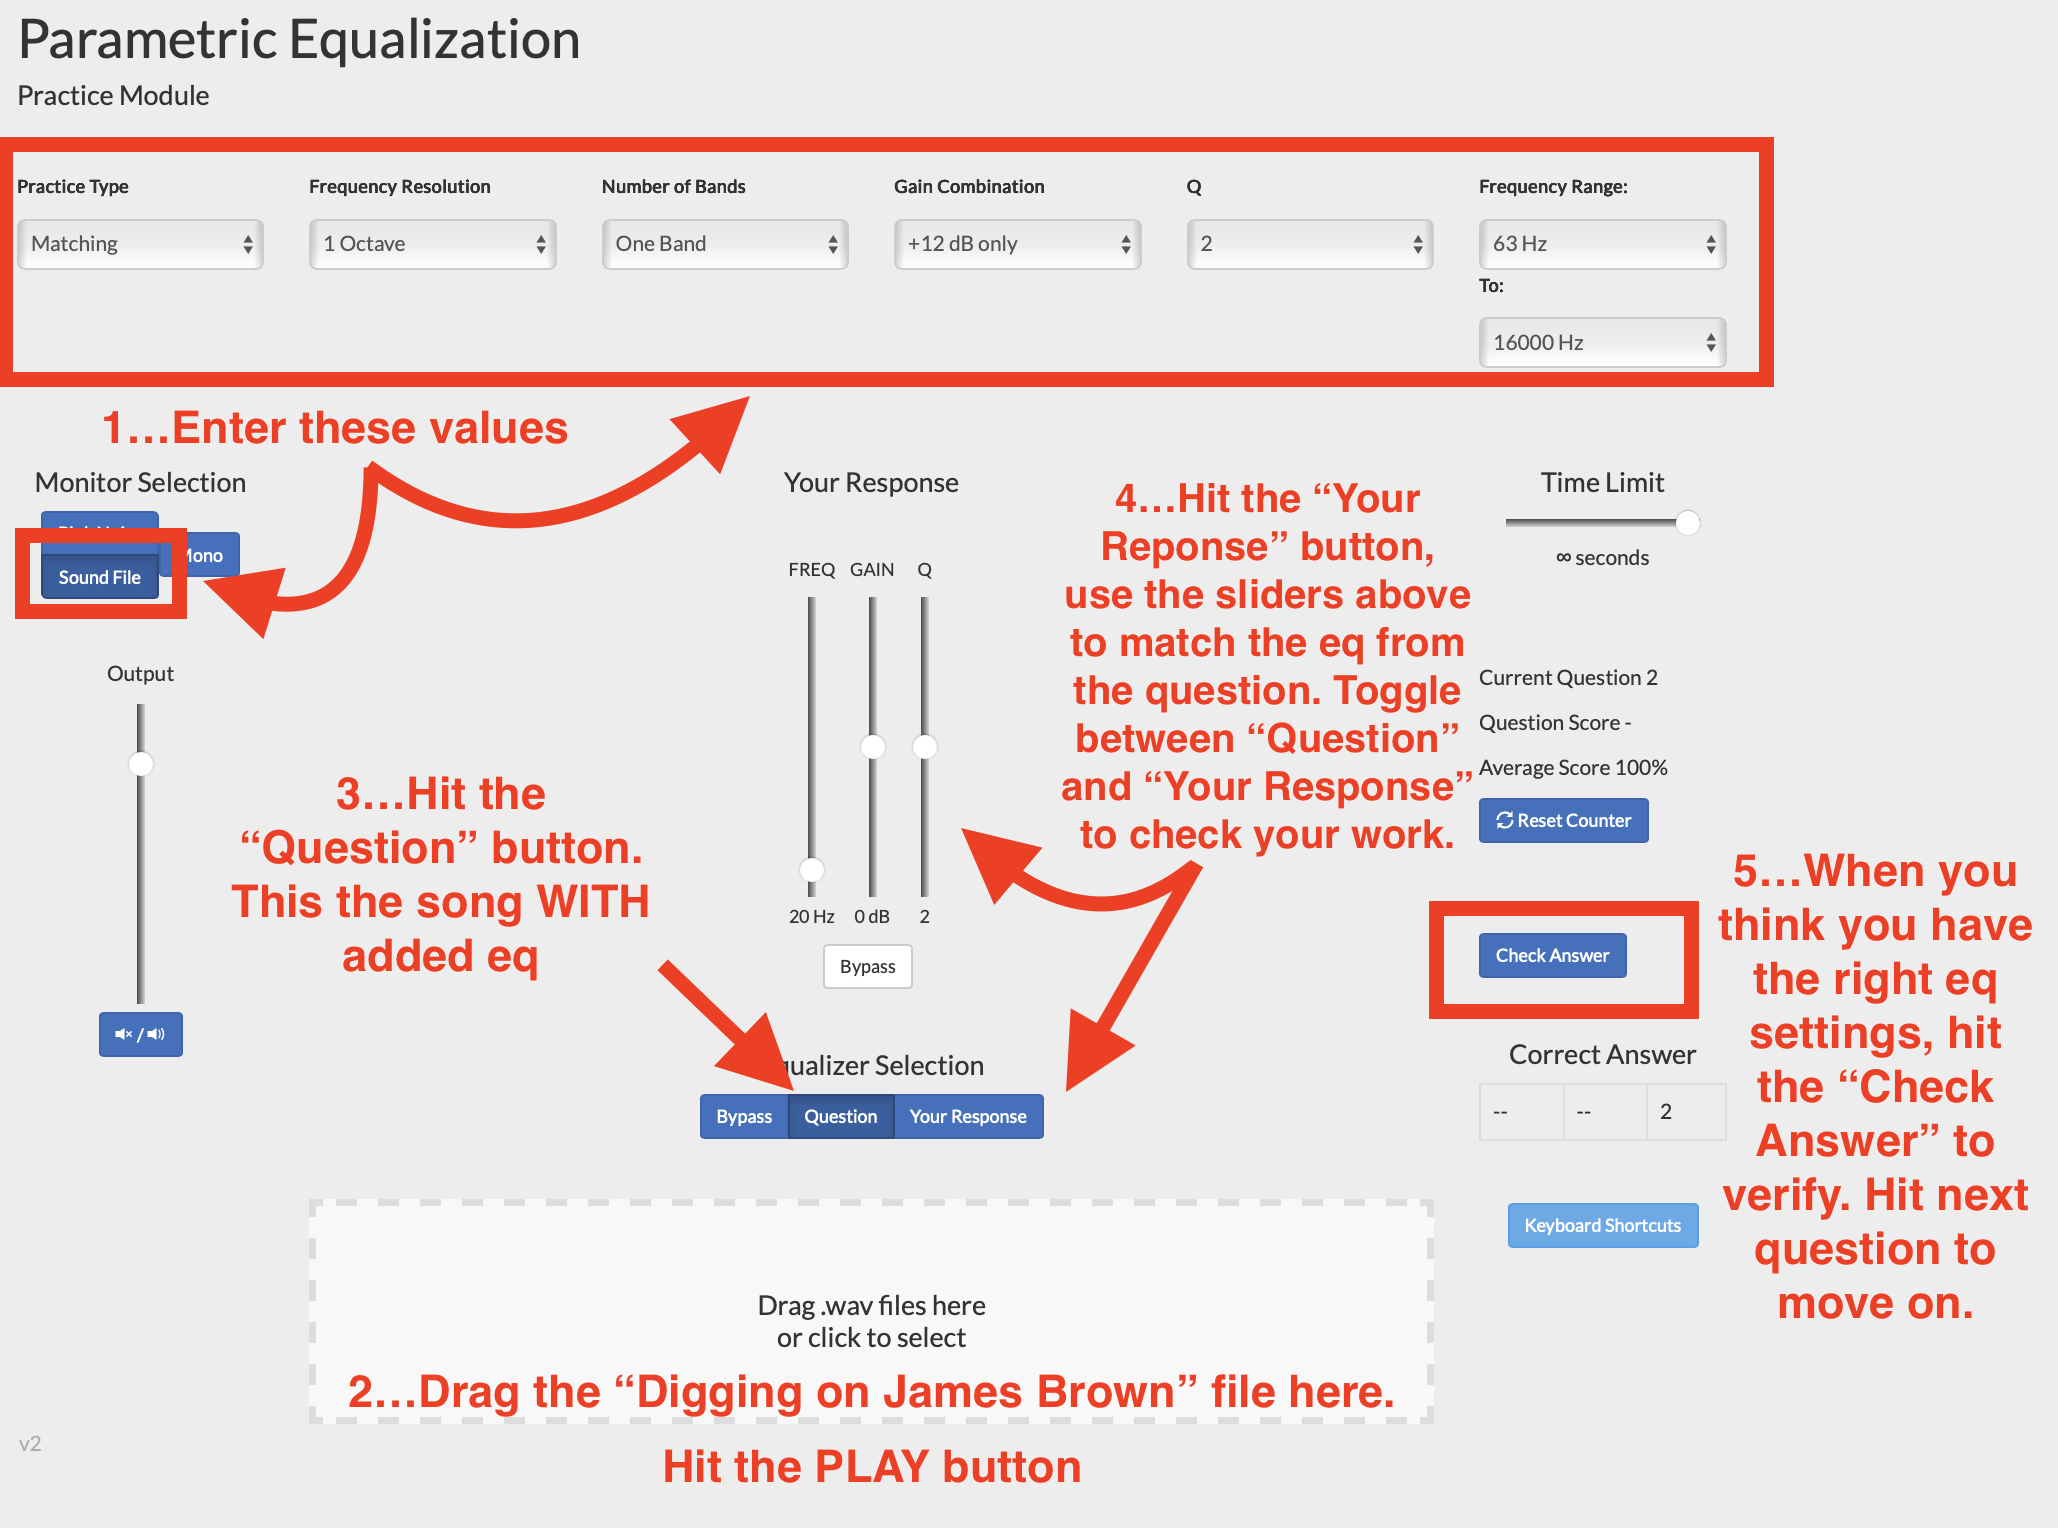
Make sure you use the "Digging on James Brown" song that's included in the audio folder you downloaded above.
• Complete at minimum 20 questions using the suggested settings and song. After that, optionally, feel free to change to a song of your choice, and/or to modify the test parameters to make it more difficult (for example, consider changing the "Gain Combination" setting to +12/-12dB or even +12/+6/-12/-6dB).
• Take a screenshot of your final results, and upload it to your student folder on the 317 computer.
Grading:
/5 Overall EQ
/5 Overall Reverb
Total /10
Be prepared to present your Logic project in class.